
I’ve just joined a great new page on Facebook called ‘Baking Our Way Through The Book of Buns‘ where every two weeks a recipe is chosen from the book for people to bake and to post their photos. I think this is a great idea and I will be joining in if I haven’t already baked the bun picked. I missed the first recipe as I was just about to go away on holiday, so I thought I would bake this when I got back. They’re now onto their second recipe, which will be the next recipe that I bake, hopefully in the next few days, so I have a chance to add my photo to their collection! It certainly gives you encouragement to see others baking from the same book and you can also compare bakes, etc.
This recipe originates from the USA and if you make it without wheat flour you can make some gluten-free buns. The foreword says:-
Cornmeal (also known as polenta) makes an excellent addition to bread and buns. These buns are delicious at breakfast with honey or jam, and equally satisfying with lunch or dinner”.
Ingredients
Cornmeal Mush
- 150g coarsely ground cornmeal/polenta
- 30g lard or butter
- 60g honey or molasses
- 250g milk
Dough
- 500g strong white or wholemeal/wholewheat (bread) flour
- 1¼tsp instant yeast, 1¾tsp dry yeast or 10g fresh yeast
- 10g salt
- 150g water
Glaze
- 1 egg
- 1tsp water
- pinch of salt
- pinch of sugar
- polenta (to decorate)
Oven 220°C, 425°F, Gas 7
Makes 18 buns
Method
It was rather hot today, so luckily with the old kitchen not yet having been knocked through into the extension which will be my new kitchen, at the moment, my kitchen doesn’t have a south-facing window so it does remain quite cool until the afternoon, so I decided to make the buns this morning.
The ‘cornmeal mush’ was the first thing to make and just reading the word ‘mush’ I wondered what I would be doing? It turned out to be simply putting the polenta/cornmeal into a bowl with the lard/butter and honey/molasses, heating the milk until just below boiling point and pouring it over the ingredients. This was then stirred around until the fat had melted and everything was combined together. I must admit it didn’t look very appetising! This then had to be left to cool completely.
I took the chance to sit in the garden for 30 minutes enjoying the glorious summer we are having at present, whilst the ‘mush’ cooled down.
I was using instant yeast for this recipe as I haven’t yet had chance to nip out to the local Polish shop to pick up some fresh yeast, so the method for the dough if using instant of fresh yeast is to add the flour to the bowl, sprinkle over the yeast and add all the other ingredients including the cornmeal ‘mush’ and mix it together into a ball. This was then turned out onto the worktop and kneaded for 10 minutes. The dough, as normal was quite sticky, but not was sticky as some of the other buns I’ve already baked.
If you are using dry yeast, make a well in the flour and add the yeast and water and allow it to rest for 15 minutes, after which time you should have a beige sludge forming on the top of the liquid. If you don’t, don’t worry as long as the yeast is fully dissolved, Jane says it will work. At this stage you add all the other ingredients including the ‘mush’ and mix together into a ball and then turn out and knead as above for 10 minutes.
After kneading the dough for 10 minutes, return it to the bowl, cover it and leave it for 2 hours. I must admit I was very surprised to see just how much my dough had risen after two hours, I think it may have been due to the fact that although my kitchen window faces west, it was still very warm in the house.
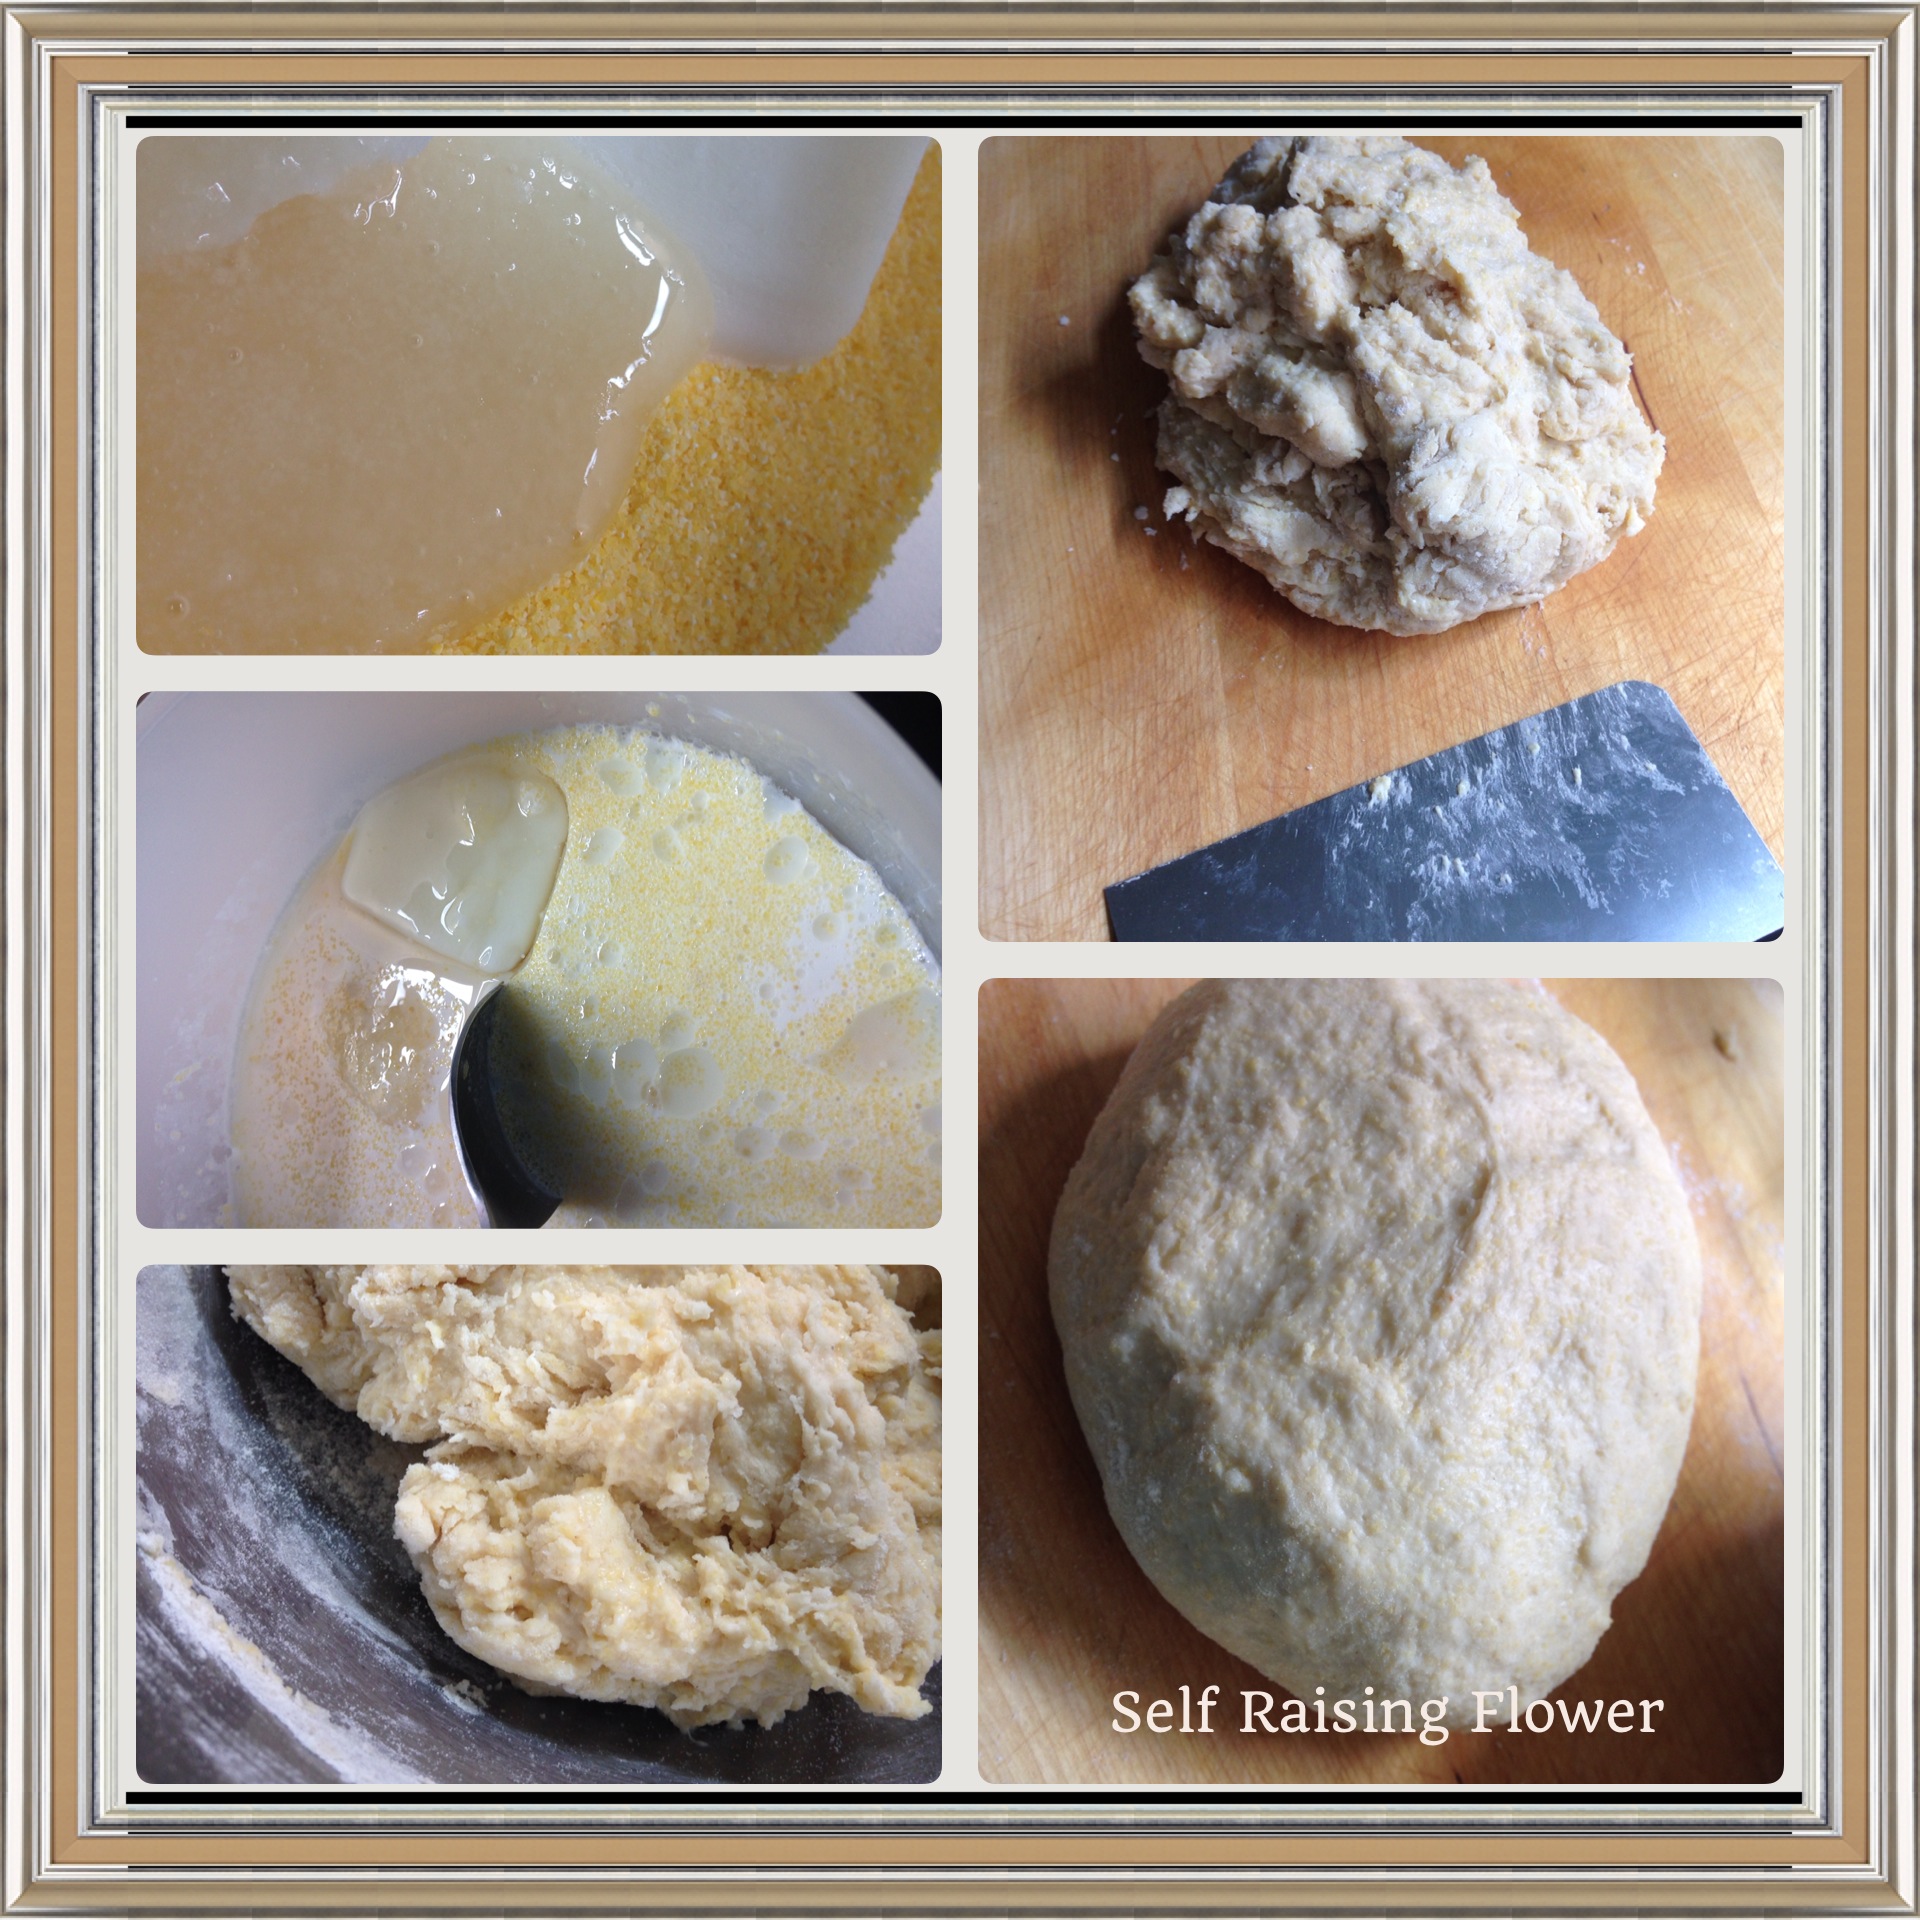
The dough was pulled gently out onto an unfloured surface. I weighed the dough and divided it into 18 equal portions, each roll weighed 60g. Each one of these was shaped into a tight ball by firstly folding the dough in on itself as though you were going around the hands of a clock and then cupping your hand over the top of the dough and rolling it around with your fingertips resting on the worksurface, pressing down gently until a ball is formed. Once formed, the dough ball was placed onto the baking tray, leaving a gap between each one. These were covered with a dry teatowel for an hour.

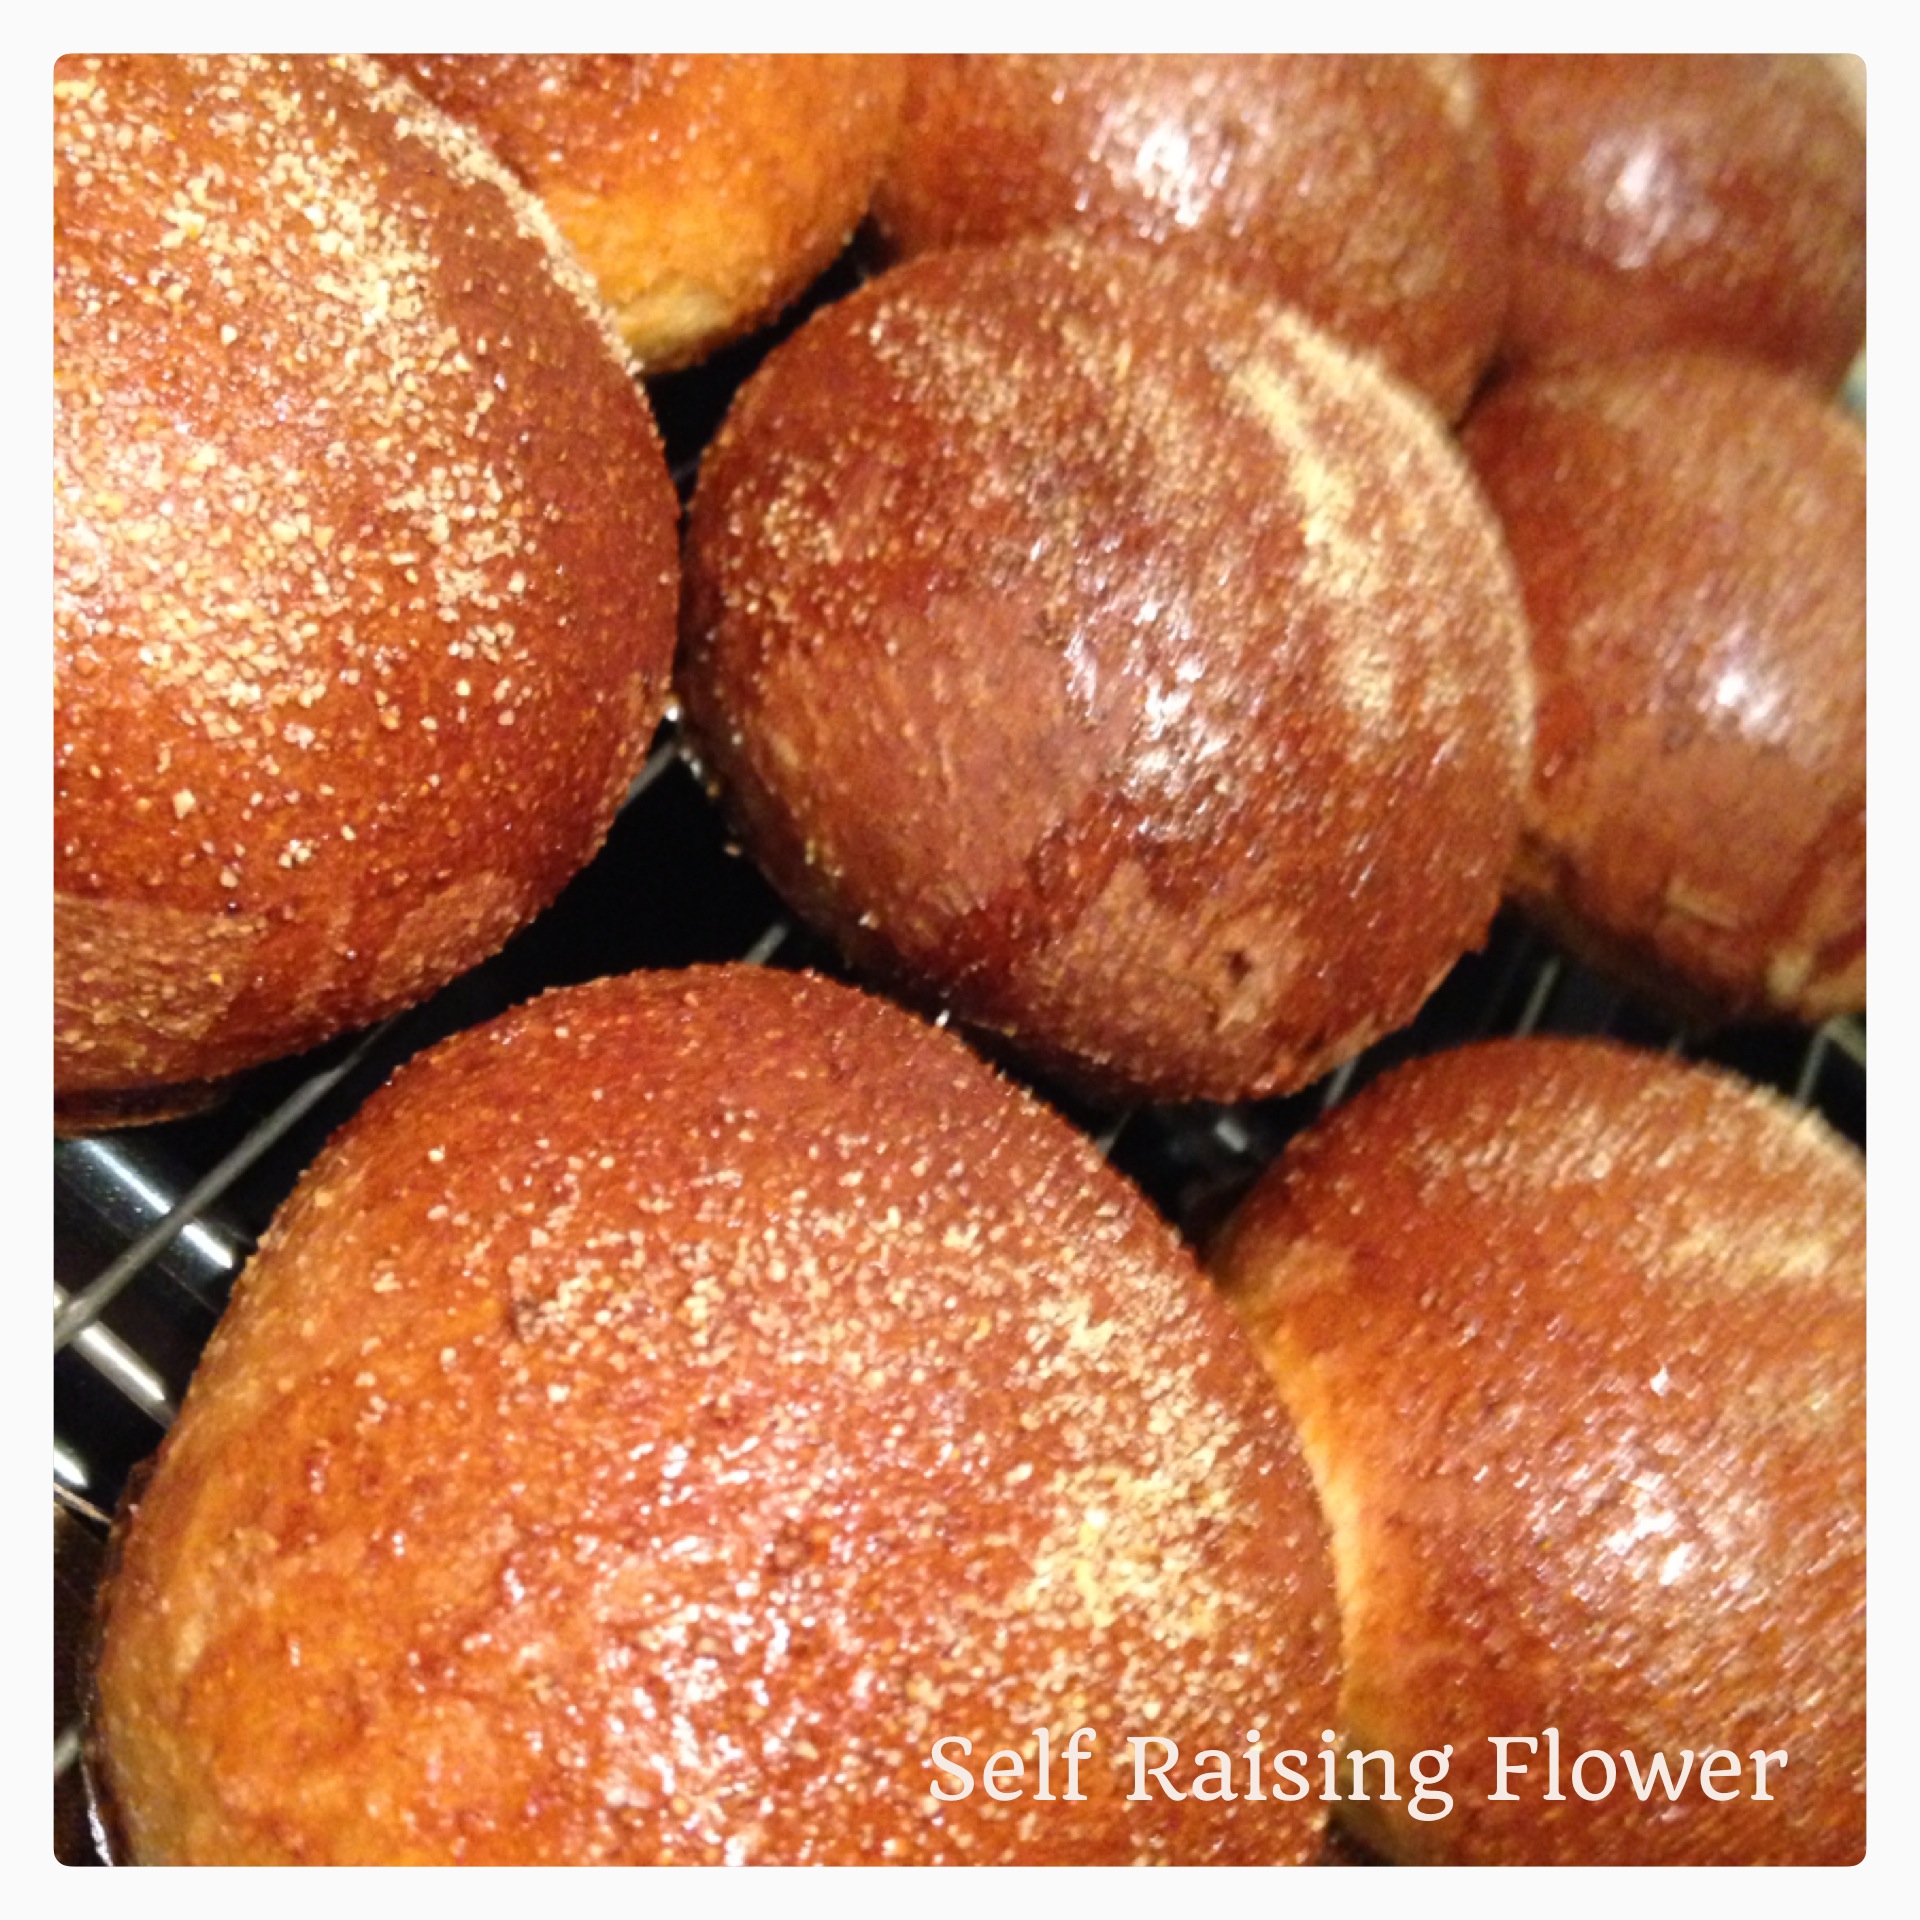
The oven was then put on to preheat. Once up to temperature the ingredients for the glaze were mixed together and brushed liberally over the top. The last thing to do was to sprinkle a little polenta over the top of them.
Into the oven they went for 20 minutes. I did in fact forget to reduce the temperature of my oven to when the buzzer went off to let me know that they had 5 minutes left, I had a quick look at them and saw that they had already gone quite golden brown on top. I popped them out of the oven and gave the bottom of a couple of the buns a tap to see if they sounded hollow. They did, so I removed them from the oven and put them on a wire tray to cool. I couldn’t wait very long to try one as the smell of baked bread was so good. Tastewise they are quite a sweet bun – it must have been the honey that I put in them. They’re definitely a bun that I would enjoy with some of my homemade strawberry jam on!!
If you want to buy The Book of Buns, I got mine from The Book People at a fantastic price of £4.99!

Hi,
I’d like to invite you to join our site http://www.erecipe.com . I really enjoy your blog and recipes and I think the over 8,000 unique daily visitors to eRecipe will too.
By joining eRecipe, we will provide the Nutrition Facts for every recipe you post in which you could customize and add to your blog. Viewers need and love to know the nutritional facts. Its a free service that we offer to blogs and recipes we really love. It looks professional and your members will love it.
Simply visit http://www.erecipe.com or contact me at erecipe00@gmail.com. We look forward having you in our network!
Best,
Michelle
LikeLike